Determine Proper Height
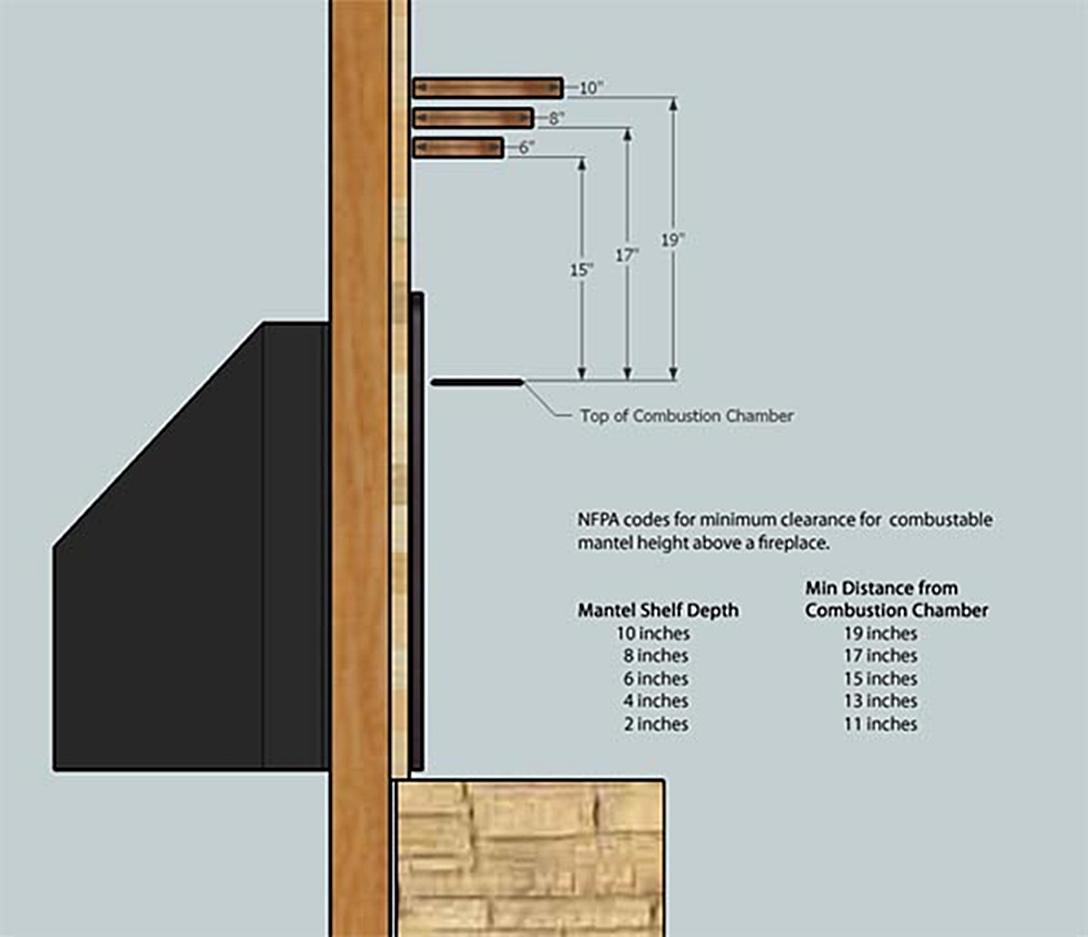
Regardless of which method you use below, you will need to identify the height at which you want the mantel to be placed. Because wood is a combustable material, you'll want to follow some established guidelines for the minimum distance between a fireplace and a wood mantel. For real wood fireplaces, the following guidelines from the National Fire Protection Association (NFPA) match the requirements of most localities. However, be sure to comply with the local laws and manufacturer recommendations. Gas fireplaces are often considered "zero-clearance" and may have different requirements.

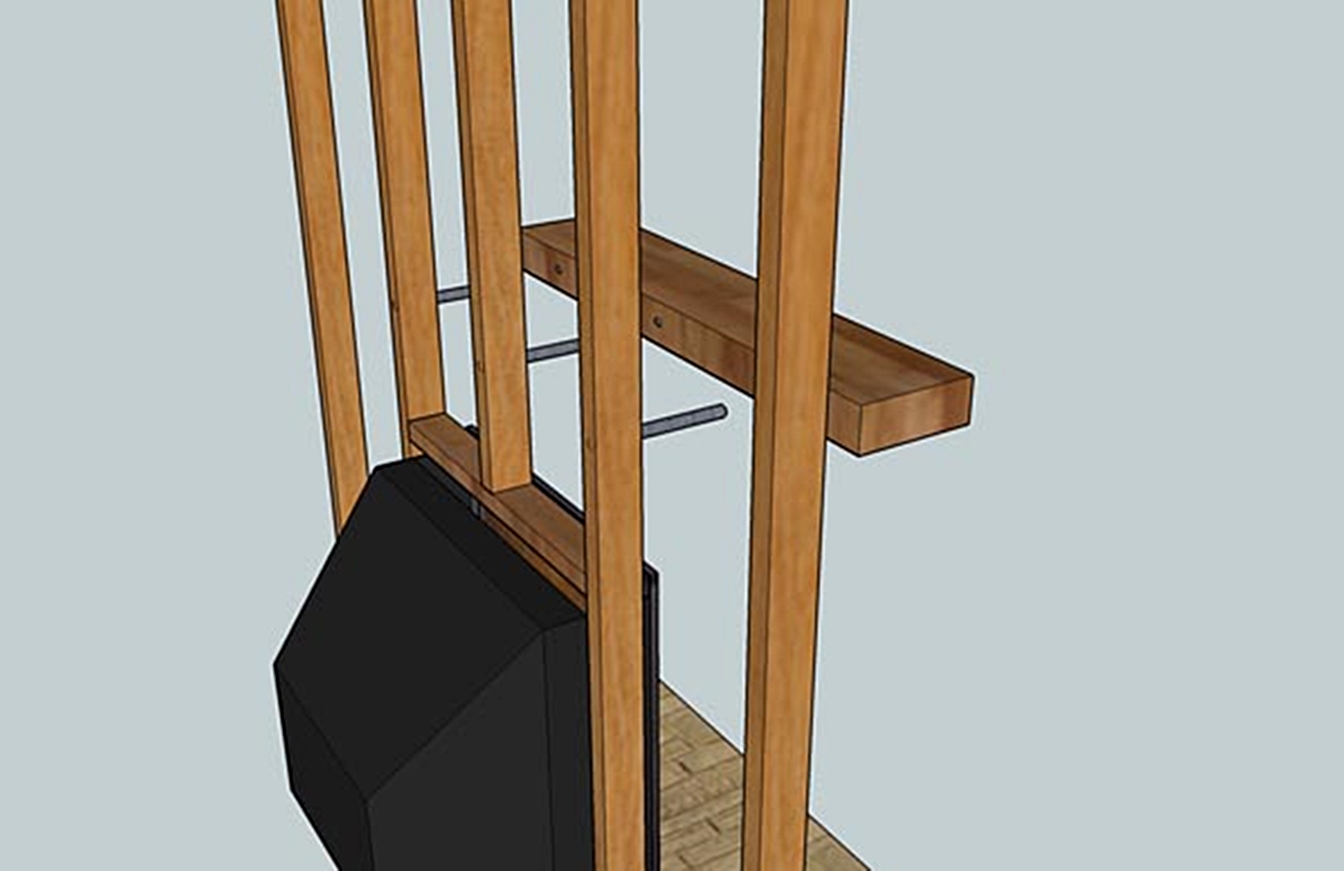
1) Locate the studs behind the brick, stone, or faux veneer.
2) Drive 1/2in to 3/4in rods or lag screws through each of the studs. Some installers will use rebar, others will use 3/4 x 12 inch lag screws. The advantage of lag screws is that they can be securely driven into the studs. On the other hand, they can be a little short for many mantels. Once the lag screws are in place, cut the heads off with a angle grinder, hack saw, or other cutting tool.
In general, it is good to have the support rods go completely though the backing studs. Likewise, you want the rods to penetrate about 2/3rds of the depth of the mantel. (i.e. a 10" mantel should have 6.67" deep holes).

3) Have a helper support the mantel while you mark the location of the support rods on the back of the mantel. Drill corresponding hole into the back of the mantel. Test fit the mantel to make sure the holes have been properly drilled.
4) Apply construction adhesive into the holes. Optionally, if a good surface exists, apply glue onto the wall and the back of the mantel .
5) Slide into place, admire, and enjoy!
Anchored in Masonry Method
If you cannot reach or locate the supporting studs AND you have thick (4 inch plus) masonry, you can use the masonry work to support your mantel. The significant difference is that in step one above, you will want to drill holes in the brick work with a hammer drill and use a lead masonry anchor.
Next, tap in a lead expansion anchor before placing in a bolt or rod.
Follow steps 2-5 above
Be sure that your masonry is strong enough and that your mantel does not have so much depth that it creates a very strong lever against the masonry.
Backer Board Method
The Slide on Over Rebar Method is, honestly, used frequently when the fireplace masonry is already done or nearly done. If you catch the process early on and you have some room to move around behind the fireplace installation, this approach is arguably easier and stronger.
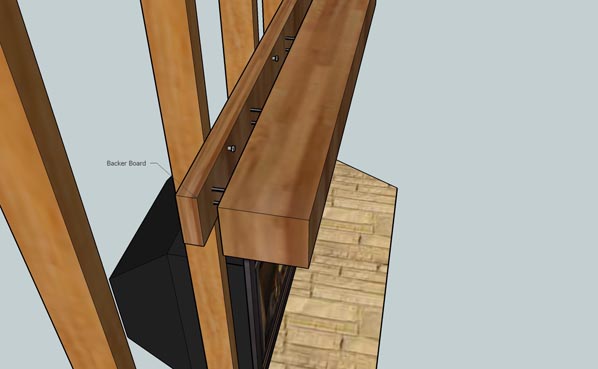
1) Cut a "Backer Board" that is as deep as the masonry surface is thick, as thick as the mantel is high, and as long as the mantel is width.
2) Attach the backer board to as many studs as possible with 2 lag bolts per stud from the front face of the fireplace. You'll want to pre-drill a countersink hole so that bolt head is flush with the backer board's surface. 5 inch or 6 inch lags are usually sufficient lenth.
3) Temporarily clamp the mantel to the backer board. Pre-drill the screw holes. Screw lag bolts through the backer board and into the back of the mantel. Use the same number of bolts from the backer board to the mantel as were used from the backer board to the studs. Bolts should be long enough to cover 2/3 of mantel depth + the thickness of the backer board.
4) Complete the fireplace installation, masonry, and enjoy!
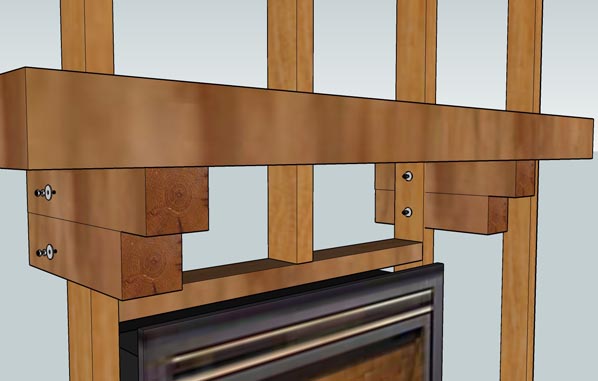
More often than not, the corbels that are shown on fireplace mantels are
decorative only. However, corbels can be attched to the stud work to create a
very strong mounting structure as well.

1) Start with corbels that are:
2 inches + stud width + masonry width + mantel depth - 1 to 2
inches.
2) Carefully cut out a tight notch from the corbel in which the stud will sit.
3) Run bolts through the corbel and the stud. Fasten together.
4) Complete the rest of the fireplace and masonry installation.
5) Apply adhesive on top of the corbels. Position mantel on top. Clamp until
dry.